IMPORTANT:
When backing up the database, please make sure to also backup the encryption key files located in /home/oracle/security and restore those files if the database restore occurs on a different or rebuilt server.
METHOD 1 - Using the RSA-provided script files.
To export the database:
Login to the server as the oracle user and execute:
acm stop
cd /home/oracle/database/DBA/AVDB/scripts
./AVDB_Export_AVUSER.sh -t <optional tag on the filename>
This creates a backup file called Export_AVDB_avuser<optional tag on the filename>.dmp in the /home/oracle/AveksaExportImportDir directory.
To import the database:
Login to the server as the oracle user and execute:
acm stop
cd /home/oracle/database/DBA/AVDB/scripts
./AVDB_Import_AVUSER.sh -t <optional tag on the filename>
This imports a backup file called Export_AVDB_avuser<optional tag on the filename>.dmp from the /home/oracle/AveksaExportImportDir directory.
For example,
./AVDB_Export_AVUSER.sh -t _112119 creates a file called Export_AVDB_avuser_112119.dmp, and
./AVDB_Import_AVUSER.sh -t _112119 imports a file called Export_AVDB_avuser_112119.dmp
If any problems occur during the export or import of a database, please review the appropriate log file for each:
- /home/oracle/AveksaExportImportDir/Export_AVDB_avuser-{YYYY-MM-DD-##-##}.log
- /home/oracle/AveksaExportImportDir/Import_AVDB_avuser.log
METHOD 2 - Using alias commands at the command line prompt
This is the same as METHOD 1 only there are alias names defined that will execute the script files for you. These alias names are:
alias avdbexport='/home/oracle/database/DBA/AVDB/scripts/AVDB_Export_AVUSER.sh'
alias avdbimport='/home/oracle/database/DBA/AVDB/scripts/AVDB_Import_AVUSER.sh'
To export the database:
Login to the server as the oracle user and execute:
acm stop
avdbexport -t <optional tag on the filename>
This creates a backup file called Export_AVDB_avuser<optional tag on the filename>.dmp in the /home/oracle/AveksaExportImportDir directory.
To import the database:
Login to the server as the oracle user and execute:
acm stop
avdbimport -t <optional tag on the filename>
This imports a backup file called Export_AVDB_avuser<optional tag on the filename>.dmp from the /home/oracle/AveksaExportImportDir directory.
For example,
avdbexport -t _112119 creates a file called Export_AVDB_avuser_112119.dmp, and
avdbimport -t _112119 imports a file called Export_AVDB_avuser_112119.dmp
If any problems occur during the export or import of a database, please review the appropriate log file for each:
- /home/oracle/AveksaExportImportDir/Export_AVDB_avuser-{YYYY-MM-DD-##-##}.log
- /home/oracle/AveksaExportImportDir/Import_AVDB_avuser.log
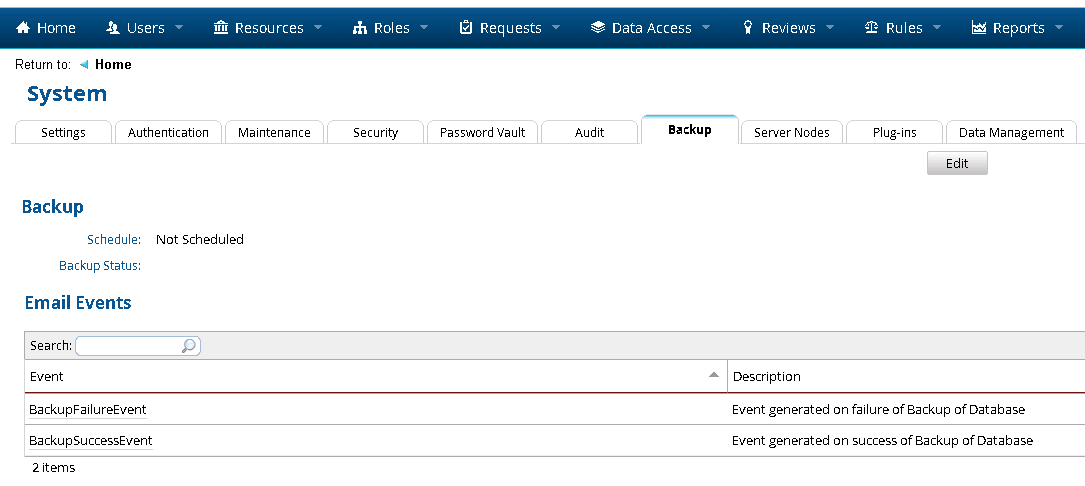
METHOD 3 - Using the backup utility in the user Interface
This method is only available on RSA Identity Governance & Lifecycle hardware and software appliances.
The database can be backed up from the user interface. The advantage to this method is that the system can remain online and there is no downtime. However, the disadvantage is that there is always a risk to the integrity of the backup file if users are accessing the database at the same time that a backup is being performed. Additionally performance will be slower due to database contention. If you use this method, it is recommended to use it on a database during its quietest time. If possible, put the system into Maintenance Mode. (Admin > System > Maintenance tab > Edit > Maintenance Mode: On). There is a bit of downtime in this mode because users are restricted from using the system, but the time it takes to shutdown and restart the application can be avoided.
To backup the database from the user interface, navigate to Admin > System > Backup tab > Edit > Scheduled: Yes.
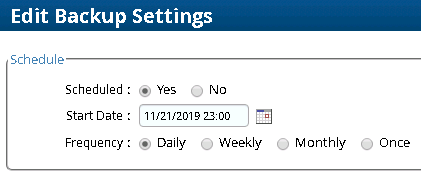
This creates a backup file called Export_AVDB_avuserYYYY-MM-DD-##-##-##.dmp in the /home/oracle/AveksaExportImportDir directory.
To import the database
Login to the server as the oracle user and execute:
acm stop
avdbimport -t YYYY-MM-DD-##-##-00
or
cd /home/oracle/database/DBA/AVDB/scripts
./AVDB_Export_AVUSER.sh -t YYYY-MM-DD-##-##-00
This imports a backup file called Export_AVDB_avuserYYYY-MM-DD-XX-XX-00.dmp from the /home/oracle/AveksaExportImportDir directory.
An example filename of an exported backup file from the user interface would be Export_AVDB_avuser2019-11-21-16-33-00.dmp. To import this file:
avdbimport -t 2019-11-21-16-33-00
or
./AVDB_Export_AVUSER.sh -t 2019-11-21-16-33-00
If any problems occur during the export or import of a database, please review the appropriate log file for each:
- /home/oracle/AveksaExportImportDir/Export_AVDB_avuser-{YYYY-MM-DD-##-##}.log
- /home/oracle/AveksaExportImportDir/Import_AVDB_avuser.log